- Start recording
 – Starts audio-only recording and announces to the room that audio recording for the meeting has begun, The indicator bar will turn red and the record button will pulse red
o Click Start recording
o Dialog box opens: Click Record
- Stop recording
 – Stops audio-only recording and announces to the room that
audio recording for the meeting has ended
o Click Stop recording
o Dialog box opens: Click Stop recording
Access Recordings
Recordings are available in OAM Online Account Management (Recordings are only kept in OAM for 30 days)
- Log in to OAM
- Select the applicable room
- Click the Recordings tab– Recordings will be accessible after they are processed. Processing times vary.
- Download the audio recording as a .wav or .mp3 file.
i. Click .wav or .mp3
ii. Download will begin and can be saved to your computer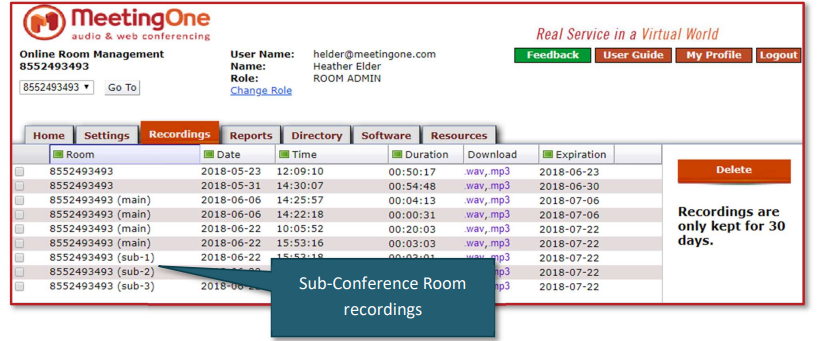
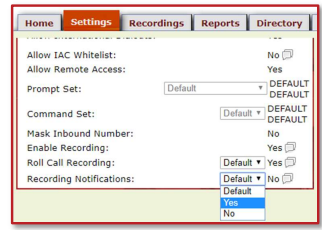
Get notified when your recordings are ready-
- Log in to OAM
- Select the applicable room
- Click the Settings tab– Navigate to the Recording Notification
- Select Yes to receive email notifications when your recordings are available
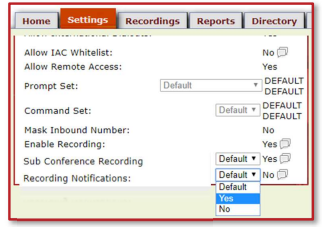
Toggle Sub-Conference Room Recordings-
- Log in to OAM
- Select the applicable room
- Click the Settings tab – Navigate to the SubConference Recording Notification
- Select Yes to allow recording of Sub-Conference Rooms