- Once you have entered your Adobe Connect room you will need to start the audio when the session is about to begin.
*If you are doing room setup Audio should not be started. - Start Audio by clicking Start Audio Conference in the pop-up window or
clicking the button at the top of the screen followed by Start
Audio Conference.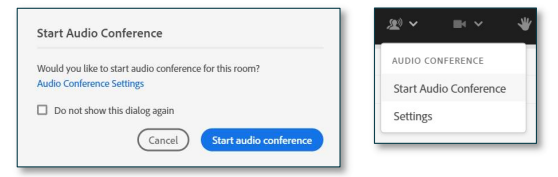
- Once the audio is connected you and your participants will see a popup window based on the options you have chosen from the Settings
Menu (Microphone, Receive a call (dial-out), Dial-in).
*If dial-in is selected, enter the identification code provided to
Merge your telephone number with your name. This code
(i.e.*65*1234#) is a one-time use code the system uses to identify
you in the current meeting room and will only work for the user for
the current session.
**Host using dial-in, it is also recommended that you enter your
audio host pin followed by # to be identified as the audio host – this
is not necessary if you use the receive-a-call option.
Everyone will choose between Phone or Device Speaker/Microphone
(depending on the type of audio selected in the audio settings menu).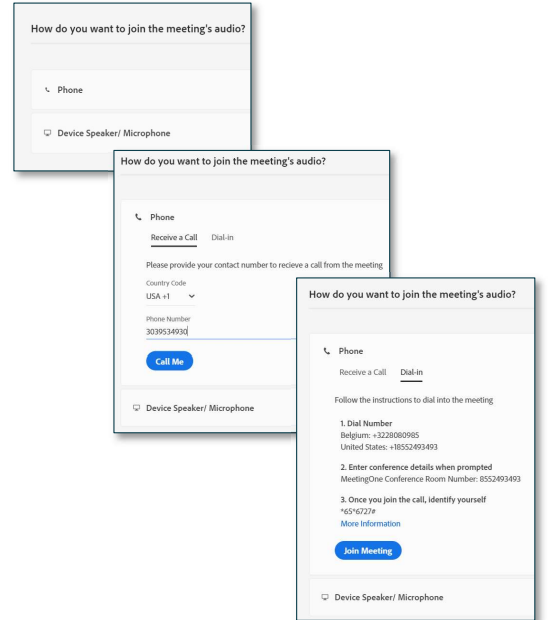
- Attendee pod: will show you who is in the room and if they are
connected via telephone by displaying a telephone next to their name.
Dial-in: If the user did not enter the identification code, they will be
listed 2 times in the list, by name and by phone number.
*If you know who the phone number belongs to you can
merge the two together by dragging and dropping the
phone number to the name or selecting the number and
name and then Merge Users.
Device Speaker/Microphone: Will appear with a microphone icon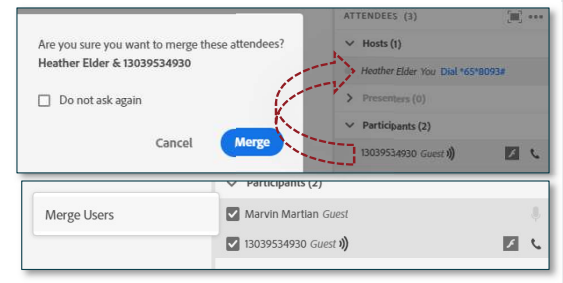
IMPORTANT: To end the Session you MUST click End Now or Stop Audio
Conference. Failing to do so will result in unwanted access to the room and
unnecessary audio charges.
